Okay...we have not updated the blog in a veeeeery long time!!! We've decided that we'll just do it twice a year. That way it's just one long night in front of the computer for all of us!
The winter has seen some slow movement on the Grouse. We got to it when we could and when the weather permitted. Now that spring has sprung we're back at it.
So here is a photo essay from the past 7 months. Roughly October to April.
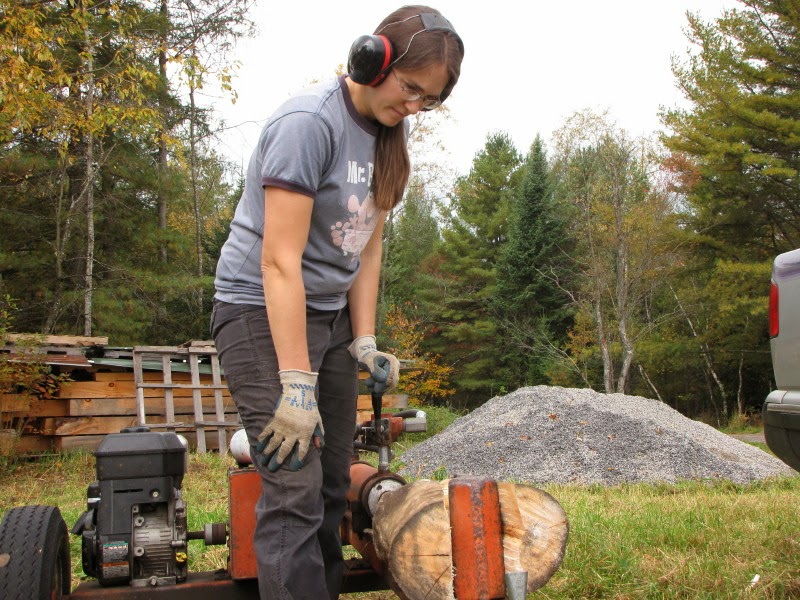
Denise staring at a log. Actually we were still cutting wood for the cordwood house last fall. IN Fact we'll be cutting more this spring/summer as well.
O.k. so this is the bright crew... We know when to stand around and watch a job done well.
Awesome! Our friend Jim came in with his skid steer and made quick work of bringing back in top soil and grading around the Grouse. We figured this would have taken us about a week or two with shovels and wheel barrows.
By December it was time to get some heat. We purchased this beast knowing that it will easily heat our 540 square foot grouse. We'll move it over to the main house when it is needed there.
Our friend Tim from Cedarcrest Construction helped us put in the chimney.
Which involved cutting a hole in the roof.
Running some double wall pipe.
And firing it up. Nice and toasty now!
Now that we had heat we could work in the chilly winter months. Here we are starting the wall for the bathroom.
Snow was all around this winter. Mira enjoyed it.
On New Years Eve it was time for the 2nd annual New Years Eve Torch-Lit Sledding Extravaganza Extraordinary (I just made up that name). We invite friends over on New Years Eve to sled by torch light and have food together. Here we are building up the snow for the tubing launch platform.
Literally truck loads of snow.
Nana was up for a visit.
We even put her to work hauling snow.
Almost done.
Ready to launch our first victim (err...I mean rider).
Building a quick lean-to for the firewood.
Cocoa and chili on the stove top.
Let it snow.
Nana's favorite spot.
As night falls people begin to show up.
The tube launch. You can see a torch in the foreground. Unfortunately you have to use a flash to see anything...which ruins the effect of the torchlight.
Lighting torches.
Going for a ride.
Big man, big hill, big fun.
The tubing run.
Getting ready for a push.
Back to building. With heat the upstairs is toasty warm. Denise is running wiring.
Nate and our friend Tim (the other Tim) studying out how to run the wire for the 3 way switch upstairs.
Ella and Zane having fun playing house.
Pulling wire.
Yes, she does know how to wire an electrical box. No, her head does not fully fill the pointed part of her hat.
Now that the wiring is done it's time for insulation. We blew in cellulose insulation so first we had to staple up a product called Insulweb.
This fabric (much like a giant dryer sheet) lets the air escape from the wall cavity as you blow in the insulation in.
Mira doing her hard work.
Nevin assisting Nate in stapler surgery.
Zane tending the fire (or Mira).
The Insulweb is all up and we are ready to blow.
The first blower we tried. We found out it didn't really have what it took to do the job.
Here is what will be insulating the Grouse. Shredded newspaper!
Suiting up.
Masked crime fighters!
The second machine we tried. Much better!
Here are some completed cavities. You over fill each space and then later roll the bulge flat before you install dry wall.
Nate manned the wand.
Denise fed the beast.
Rolling a cavity flat.
Drywall!
We don't have a picture of him but our friend Lloyd gave us a day of help and a crash course on drywalling.
A freshly sheared Nevin lending a hand.
Home schooling at 8:30pm. On the job training.
We put up furring strips in the upstairs to bring the drywall away from the insulation (which is rolled batts of Ecofill).
Stopping for a meal. Soft tacos I think.
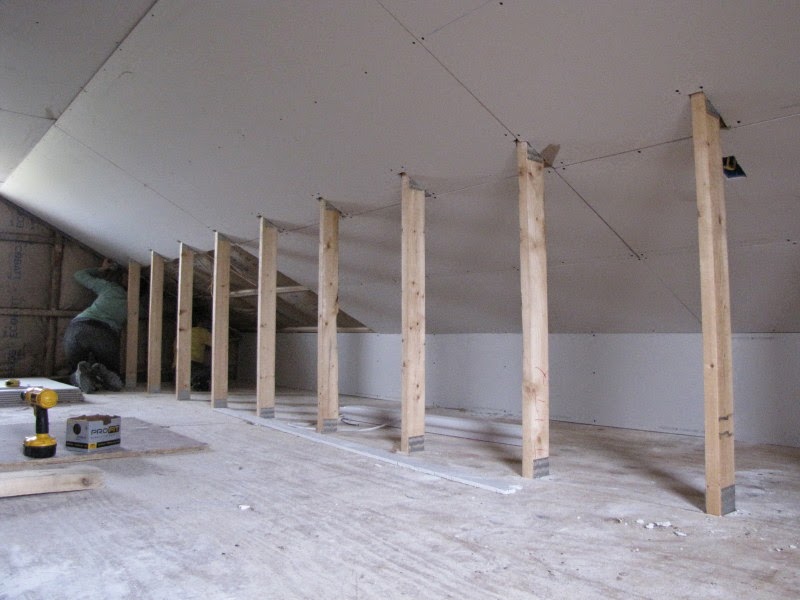
Here you can see the Ecofill (which is a natural rolled insulation with no fiberglass and other nasty stuff in it). The row of studs in the foreground are the vertical parts of our roof trusses. We cut the upstairs floor around them. The second row of smaller studs is a knee wall (more like a calf wall) that we built to finish off the upstairs and allow us some extra storage space.
Downstairs again. We want to keep the ceiling on the first floor open. Someday it will be a garage and we want to be able to hang stuff from the rafters. So we had to develop an angled wall section near the top to join the wall to the bottom of the floor above. Turned out pretty well.
The upstairs before drywall.
Starting the upstairs ceiling.
Measuring for the next piece.
Getting a lot done.
I think this is the opening to the Muppet Show or something like that.
Working our way around.
Drill baby drill!
Some more homeschooling 101. Measuring and power tools.
Good job Ella!
Some sort of random picture.
As the weather improves the kids start fort building.
A finished upstairs. Except for the walls around the stove pipe.


 \
\


No comments:
Post a Comment